WarpEngine Toolbox
WarpEngine Toolbox is a VS Code extension that takes a game from an empty folder to a released, playable entry in a WarpEngine catalog — and keeps it there — without leaving the editor. It knows no platform of its own: everything a platform needs (what it publishes, where its metadata and version live, how it plays on the web, its builder image and project template) comes from the host, so a platform the host adds works in the editor the same day.
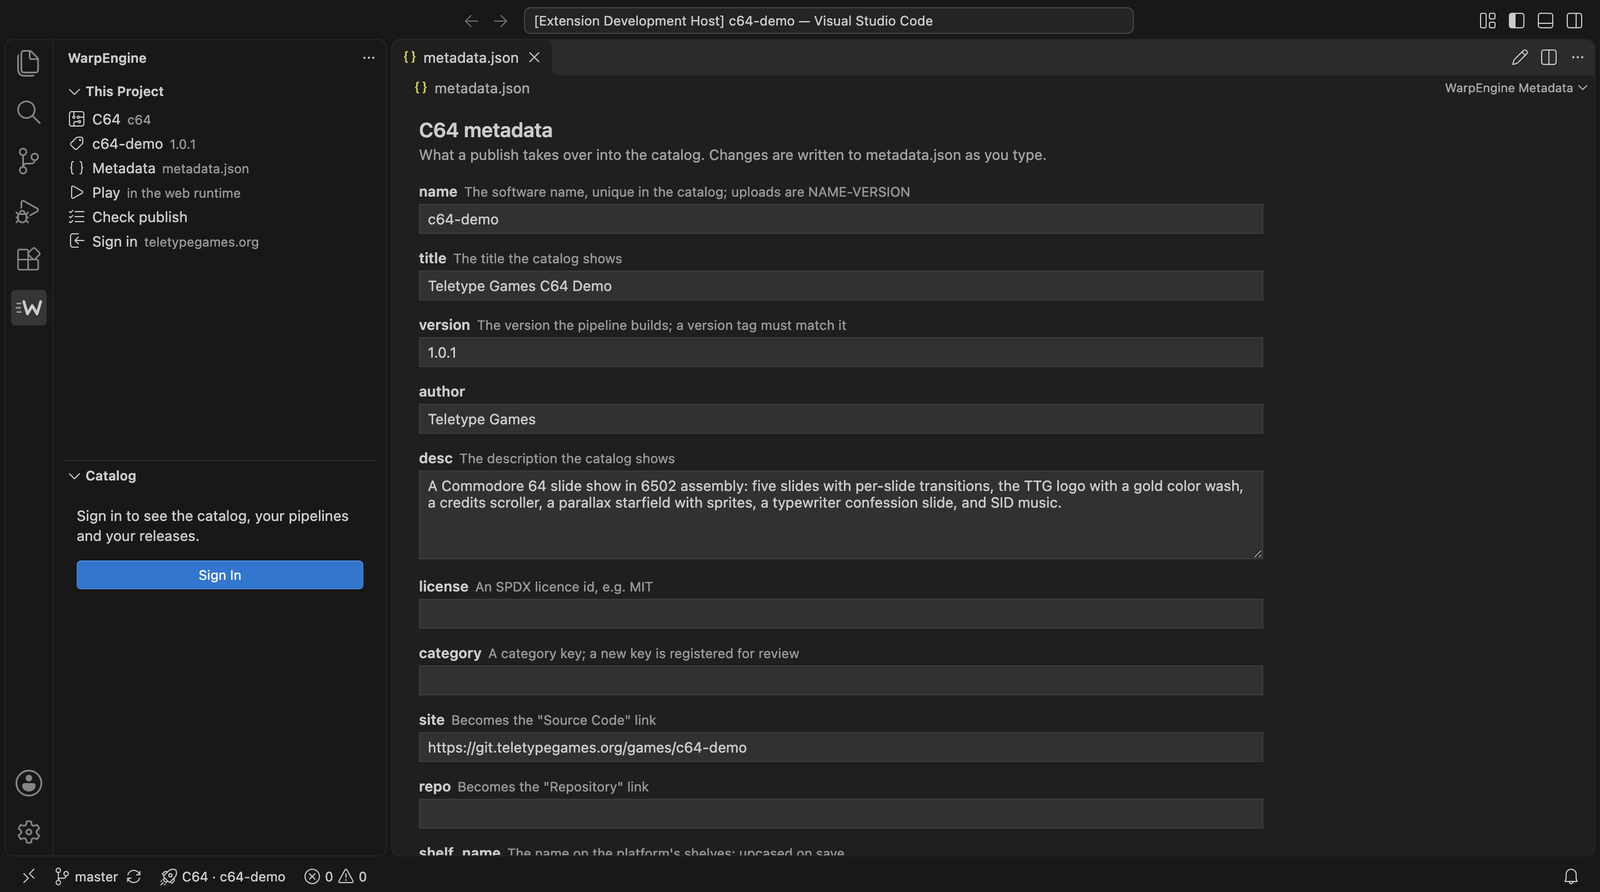
Screenshot: the C64 demo opened in VS Code with the toolbox, before signing in. The form is built from the schema teletypegames.org serves for the C64.
Install in three steps
1. Install it from the Marketplace
The toolbox is on the Visual Studio Marketplace. In VS Code open Extensions (⇧⌘X / Ctrl+Shift+X), search for WarpEngine Toolbox and click Install — or on the command line:
code --install-extension TeletypeGames.warpengine-toolbox
VS Code keeps it up to date from then on.
2. Or from a VSIX
Every version's .vsix is also attached to the releases page: Extensions ▸ ⋯ ▸ Install from VSIX…, or code --install-extension warpengine-toolbox-1.0.0.vsix. To run the latest source instead:
git clone ssh://git@git.teletypegames.org:2222/tools/warp-engine-toolbox.git
cd warp-engine-toolbox
make localinstall
make localinstall installs the build tools on the first run (Node 22 or newer), packages the extension and installs it over the version you had. Run Developer: Reload Window in the windows that were open.
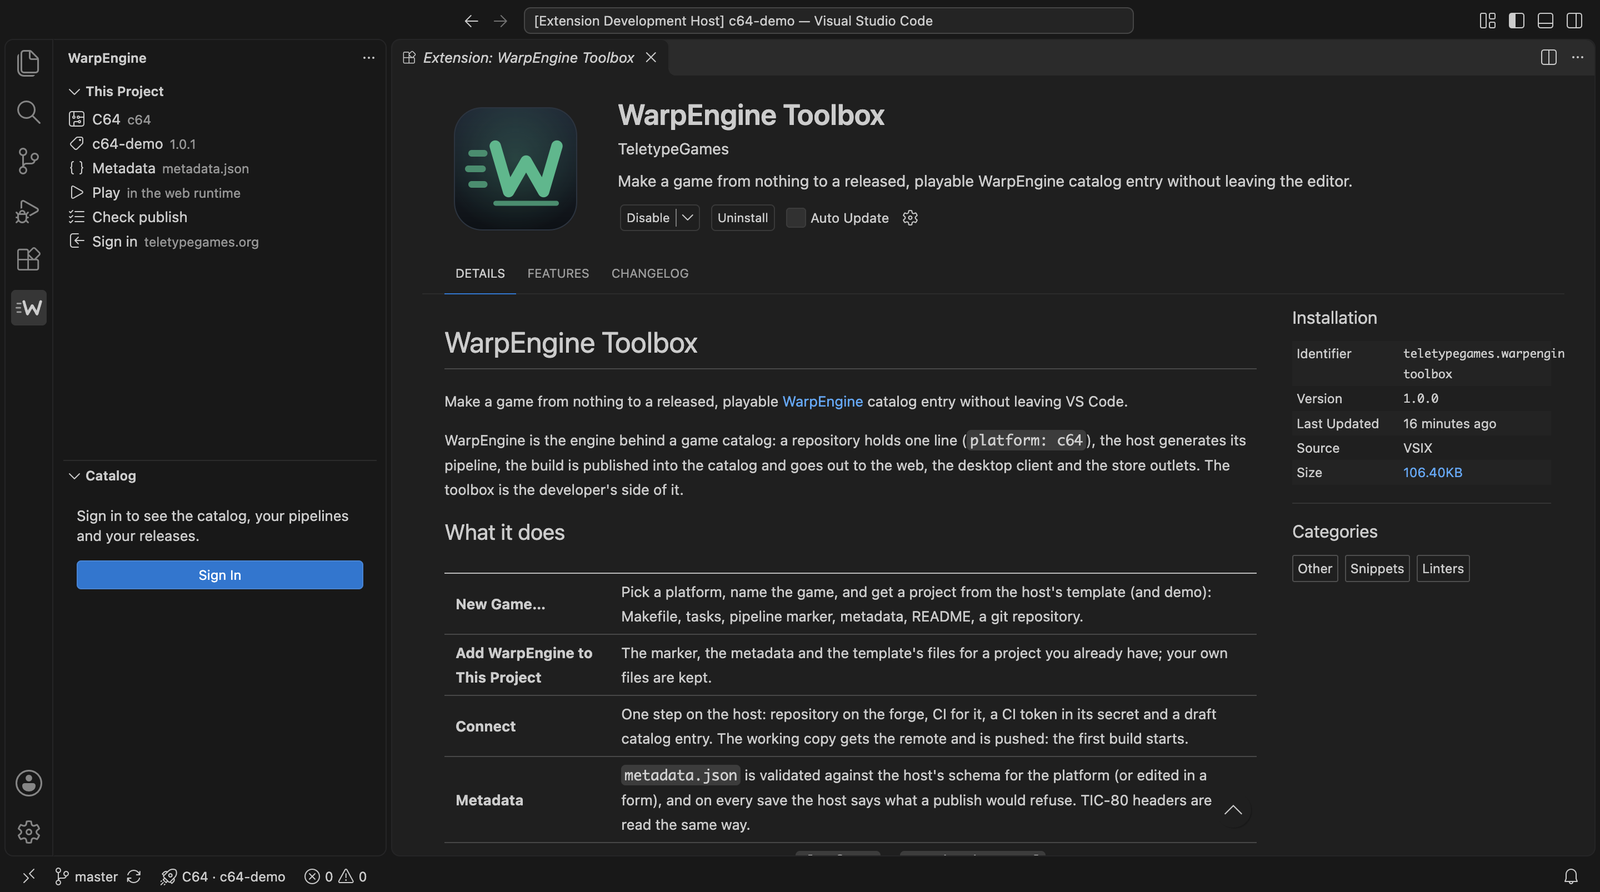
The W appears in the activity bar, and the toolbox is listed among the extensions:
3. Set the host and sign in
The toolbox ships no host: tell it which site runs your WarpEngine. Either run WarpEngine: Set Host… from the command palette, or put it in your settings:
{
  "warpengine.url": "https://teletypegames.org"
}
From here everything that only reads works: templates, metadata checks, builds, Play, the pipeline preview.
For the rest — Connect, the catalog, the pipeline status, releases — run WarpEngine: Sign In:
- the editor shows a short code and opens the host's Tool Sign In page in the browser (
/admin/tool_sign_in); - an administrator of the host signs in there, checks that the code matches, and clicks Approve;
- the editor receives an Admin API token for the scopes it asked for (
admin:read,admin:write), owned by the approving administrator. It lives in VS Code's secret storage; WarpEngine: Sign Out forgets it.
No password ever reaches the editor, and the sign-in needs nothing from the host but WarpEngine's own Admin API.
From an empty folder to a release
flowchart TB
  subgraph start[" "]
    direction LR
    A["New Game…<br/>platform, name, title"] --> B["project from the<br/>host's template"] --> C["Play<br/>local build in the<br/>web runtime"] --> D["Metadata<br/>checked on save"]
  end
  subgraph ship[" "]
    direction LR
    E["Connect<br/>repository, CI,<br/>catalog entry"] --> F["push<br/>pipeline in the<br/>status bar"] --> G["Release…<br/>version, changelog,<br/>tag"] --> H["published:<br/>web, client,<br/>store outlets"]
  end
  start --> ship
- WarpEngine: New Game… — pick the platform, name the game (lower-case letters, digits and dashes: it is the repository and the upload name too), give a title, a one-line description, the author, the licence and a category, and a folder. The project comes from the host's template — and, where the host has one, from a demo that already runs: Makefile,
.vscode/tasks.json, the one-line pipeline marker (.woodpecker.yaml),metadata.json(on TIC-80 the Lua header), a README and a first git commit. - Play (▶ in the project panel) builds the game and plays it in a panel — in the very runtime its release will play in on the web (EmulatorJS, TIC-80 …), with your local build. Click once into the panel to start it: the browser lets the game's sound start only after a click, and the emulator waits for its sound. Open in browser gives the same page in a full browser tab.
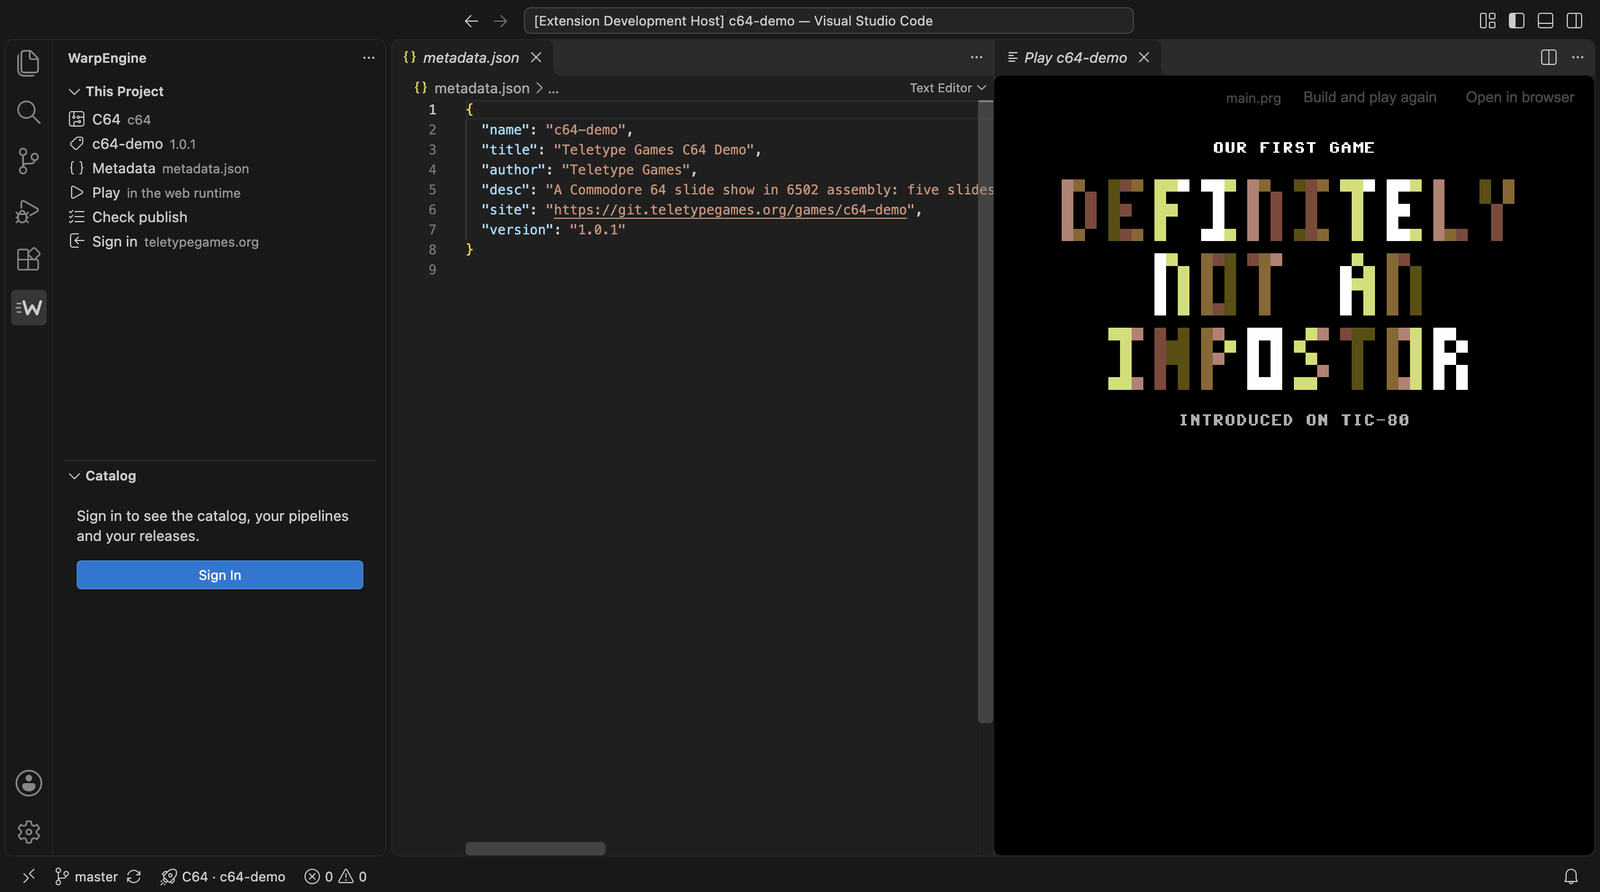
Screenshot: the C64 demo built with make build on the developer's machine, playing in teletypegames.org's web runtime inside VS Code, after the first click.
- Metadata.
metadata.jsonis validated against the host's schema for the platform as you type, and every save asks the host what a publish would refuse — a missing title, a shelf name another game holds, a version older than the published one. Edit Metadata opens a form over the file. - WarpEngine: Connect creates the repository on the host's forge, switches CI on for it, puts a CI token in its secrets and records a draft catalog entry — then points your working copy at the new repository and pushes. The first build starts.
- The status bar follows the pipeline of your current commit after every push: spinning while it runs, a tick or a cross when it ends; a click opens the run.
- WarpEngine: Release… asks for the channel — stable for everyone, or beta: a pre-release (
1.3.0-beta.1) that is listed but offered only to those who ask for beta — then bumps the version where the platform reads it, writesCHANGELOG.mdfrom the commits since the last release, tagsvX.Y.Zand pushes. The pipeline builds and publishes it, and the release appears in the project panel with its asset checklist.
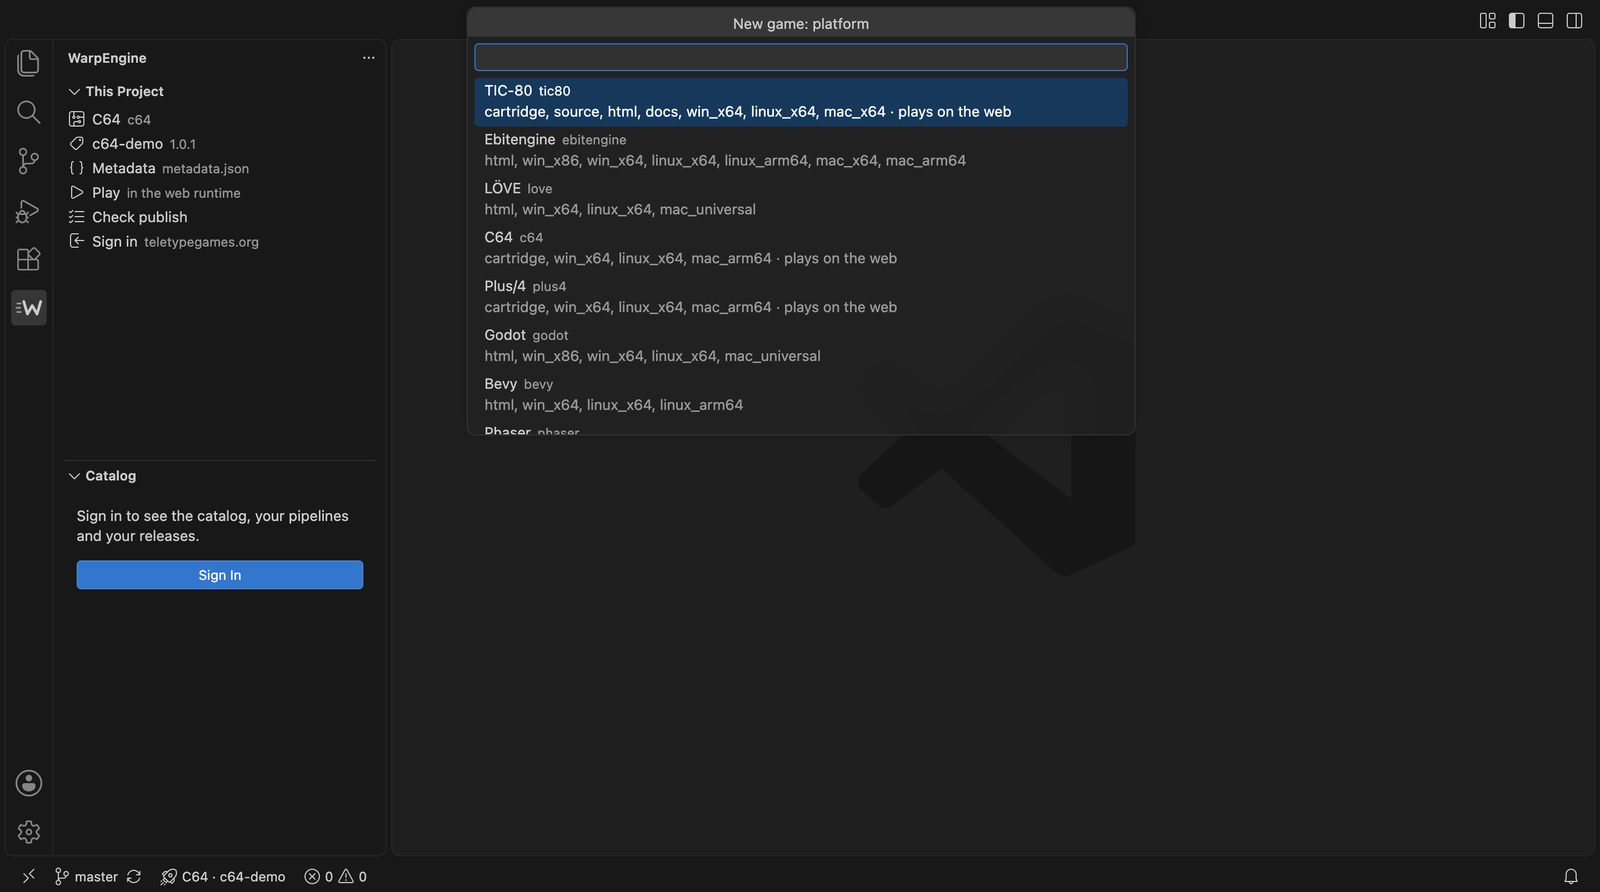
Screenshot: the first step of New Game; the list is what teletypegames.org describes at /build/platforms.
On any other branch than the default one, every push builds a development build of it: it is not listed in the catalog, but it plays and downloads by its own link. This branch in the project panel shows it with that link (Copy Link for testers), and a notification tells you when a push has built it.
To bring an existing game in instead, open it and run WarpEngine: Add WarpEngine to This Project: it adds the marker, the metadata and the template's files, and keeps every file you already have.
What is in the panel
| Part | What it shows and does |
|---|---|
| This Project | platform, name and version, metadata, Play, Check publish, Connect or Release, the pipeline with its last runs, the releases with an asset checklist ([x] built, [ ] missing, [-] uploaded by hand) |
| Catalog | the host, who you are signed in as, every software grouped by platform — title, status, category and highlight can be changed in place — with releases, links and download statistics; the pipelines |
| Status bar | the pipeline of the current commit |
| Tasks | the Makefile's targets as warpengine tasks, with problem matchers for ACME, cc65, gcc-style compilers and Lua; Build Like CI runs the build in the platform's own builder image in Docker |
.woodpecker.yaml |
completion and hover for platform:, and a lens that opens the full pipeline the host generates for the marker |
| AI | the host's Admin API is registered as an MCP server, so Copilot or Claude in the editor see the catalog, the releases and the pipelines |
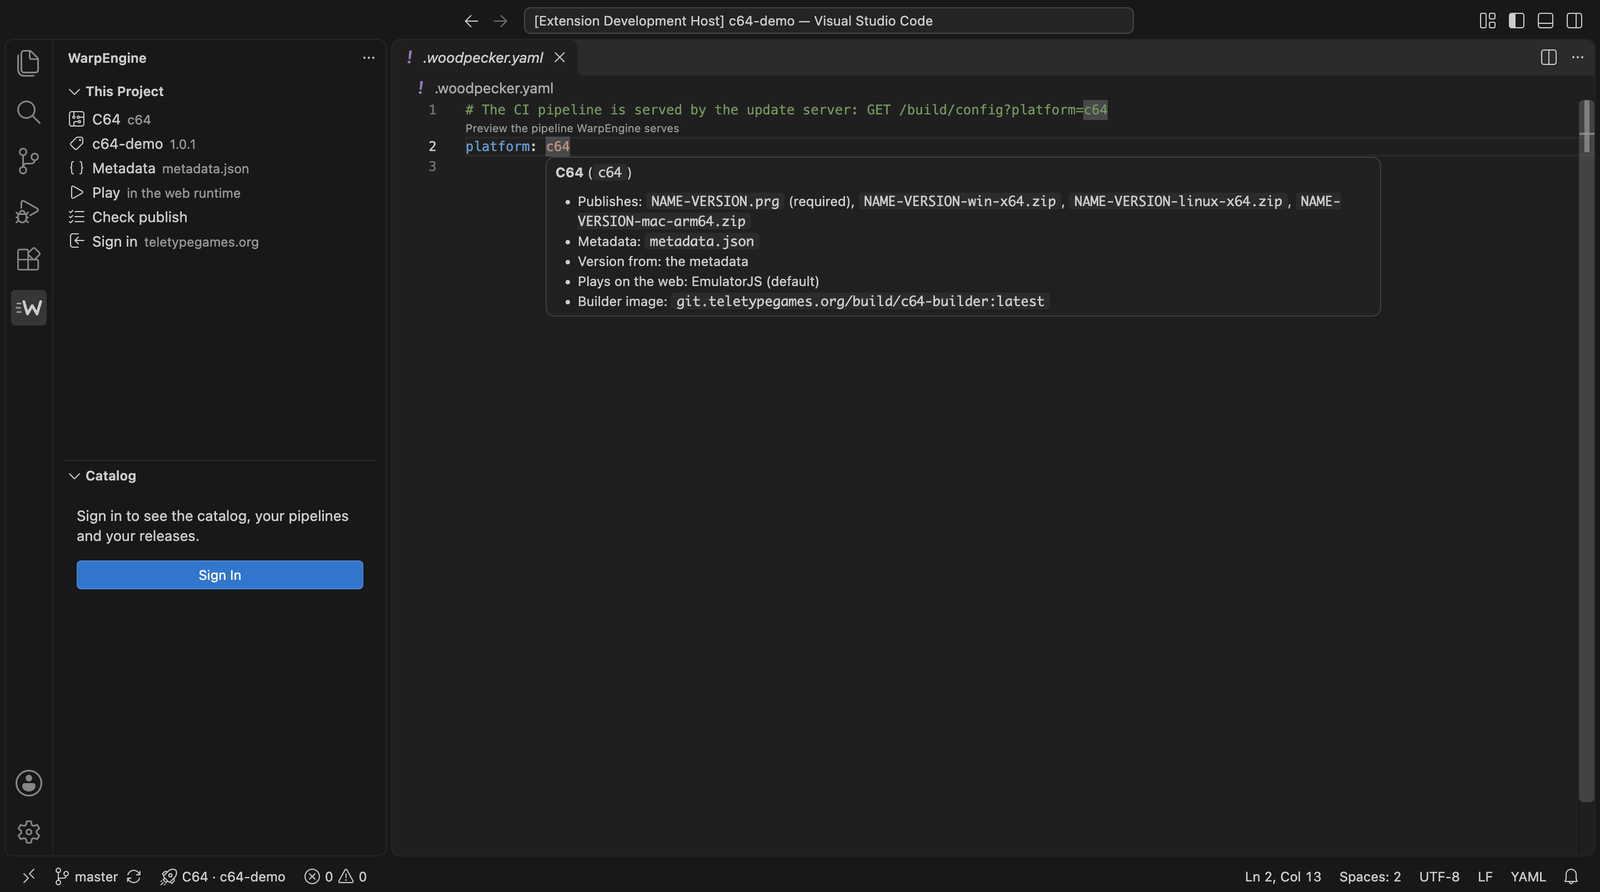
Screenshot: hovering platform: c64 in .woodpecker.yaml shows what the host knows of the platform.
Commands
| Command | What it does |
|---|---|
| WarpEngine: New Game… | a new project from the host's template (and demo) |
| WarpEngine: Add WarpEngine to This Project | marker, metadata and template files for an existing project |
| WarpEngine: Connect | repository, CI, CI token and catalog entry in one step, then push |
| WarpEngine: Play in the Web Runtime | build and play the local build |
| WarpEngine: Check Publish | what a publish would refuse, as problems in the editor |
| WarpEngine: Build Like CI (Docker) | the build in the pipeline's builder image |
| WarpEngine: Preview Pipeline | the pipeline the host serves for this repository |
| WarpEngine: Release… | version, changelog, tag, push |
| WarpEngine: Edit Metadata | the form over metadata.json |
| WarpEngine: Set Host… | choose or add the WarpEngine host |
| WarpEngine: Sign In / Sign Out | the tool sign-in |
Settings
| Setting | Default | Meaning |
|---|---|---|
warpengine.url |
empty | the address of the WarpEngine host in use |
warpengine.hosts |
empty | more hosts Set Host… offers to switch between (name, url) |
warpengine.checkOnSave |
true |
ask the host on every save of the metadata |
warpengine.docker |
docker |
the command Build Like CI runs |
warpengine.defaultLocation |
your home folder | where New Game… offers to put new projects |
What the host needs
- WarpEngine 4.0 or later, with the Admin API switched on — the toolbox reads
GET /build/platforms, the metadata schema,POST /build/check, the tool sign-in and the Admin API. - Templates: the host names a template (and a demo) per platform with
platform_tooling; without one, New Game writes only the marker, the metadata and a README. - Connect needs a forge configured on the host (
forge :gitea …) with a token that may create repositories; without it, Connect answers that there is no forge. - Play loads the host's
/play-preview/page and its runtime files (/file/_runtimes/…) through the toolbox's own local server, and hands the build over in the page; nothing is fetched from the developer's machine by the host's page.
On teletypegames.org the templates are the build/*-tools repositories, with a demo for Ebitengine, LÖVE, Plus/4, Godot (Pong), Bevy and Phaser.
When something is off
| Symptom | Cause |
|---|---|
| The Catalog panel asks for a host | warpengine.url is not set: Set Host… |
| Play stays black | click once into the panel; if it still stays black, the host is older than WarpEngine 3.8.2 |
| Connect says there is no forge | the host has no forge configured, or its token is missing |
| No pipeline in the status bar | not signed in, or the project is not connected yet |
| The sign-in page asks for a login | it is the host's admin: sign in there as an administrator first |
Source
The extension lives at tools/warp-engine-toolbox. make check runs the type check, the linter and the unit tests; npm run test:integration starts a real VS Code with a sample C64 project and runs the extension against a host (WARPENGINE_TEST_URL, teletypegames.org by default).