WarpEngine Starter Kit
Your studio's own pipeline, catalog and stores — set up in minutes, on your own machine or server, for nine platforms from Godot to the Commodore 64. The WarpEngine Starter Kit is three things that fit together: WarpEngine, the server; the WarpEngine Toolbox, the editor; and the stores, your players' screens. This page walks the whole road, from an empty machine to a game installed on a retro box.
What is in the kit
| Part | What it does for you | Read |
|---|---|---|
| WarpEngine | The server: a game catalog with an admin, the CI pipelines for every platform, the build and publish endpoints, the API every client reads | WarpEngine |
| WarpEngine Toolbox | The editor: a VS Code extension that starts a game from a template, checks it, plays it in the real runtime and releases it | WarpEngine Toolbox |
| The stores | Your players' screens: a desktop app, a Batocera box, RetroArch, a Commodore 64 Ultimate, DOS — all reading your catalog | Stores |
Three promises run through all of it:
- Push a game, it is in the store. A game repository holds one line naming its platform; the pipeline lives on the server.
- Never leave the editor. New game, metadata, playing it, releasing it — from VS Code.
- Your players, on every screen. Browser, desktop, retro boxes, real 8-bit hardware — under your own name.
flowchart LR
  ED["VS Code + Toolbox"] -->|"New Game, Connect"| FORGE["Gitea repository"]
  FORGE -->|"push, tag"| CI["Woodpecker"]
  CI -->|"asks for the pipeline"| WE["WarpEngine"]
  CI -->|"upload, publish"| WE
  WE --> WEB["Browser: play and download"]
  WE --> DESK["WarpEngine Client"]
  WE --> RETRO["Batocera, RetroArch"]
  WE --> SMALL["C64 Ultimate, DOS shelves"]
Step 1 — Set up your studio
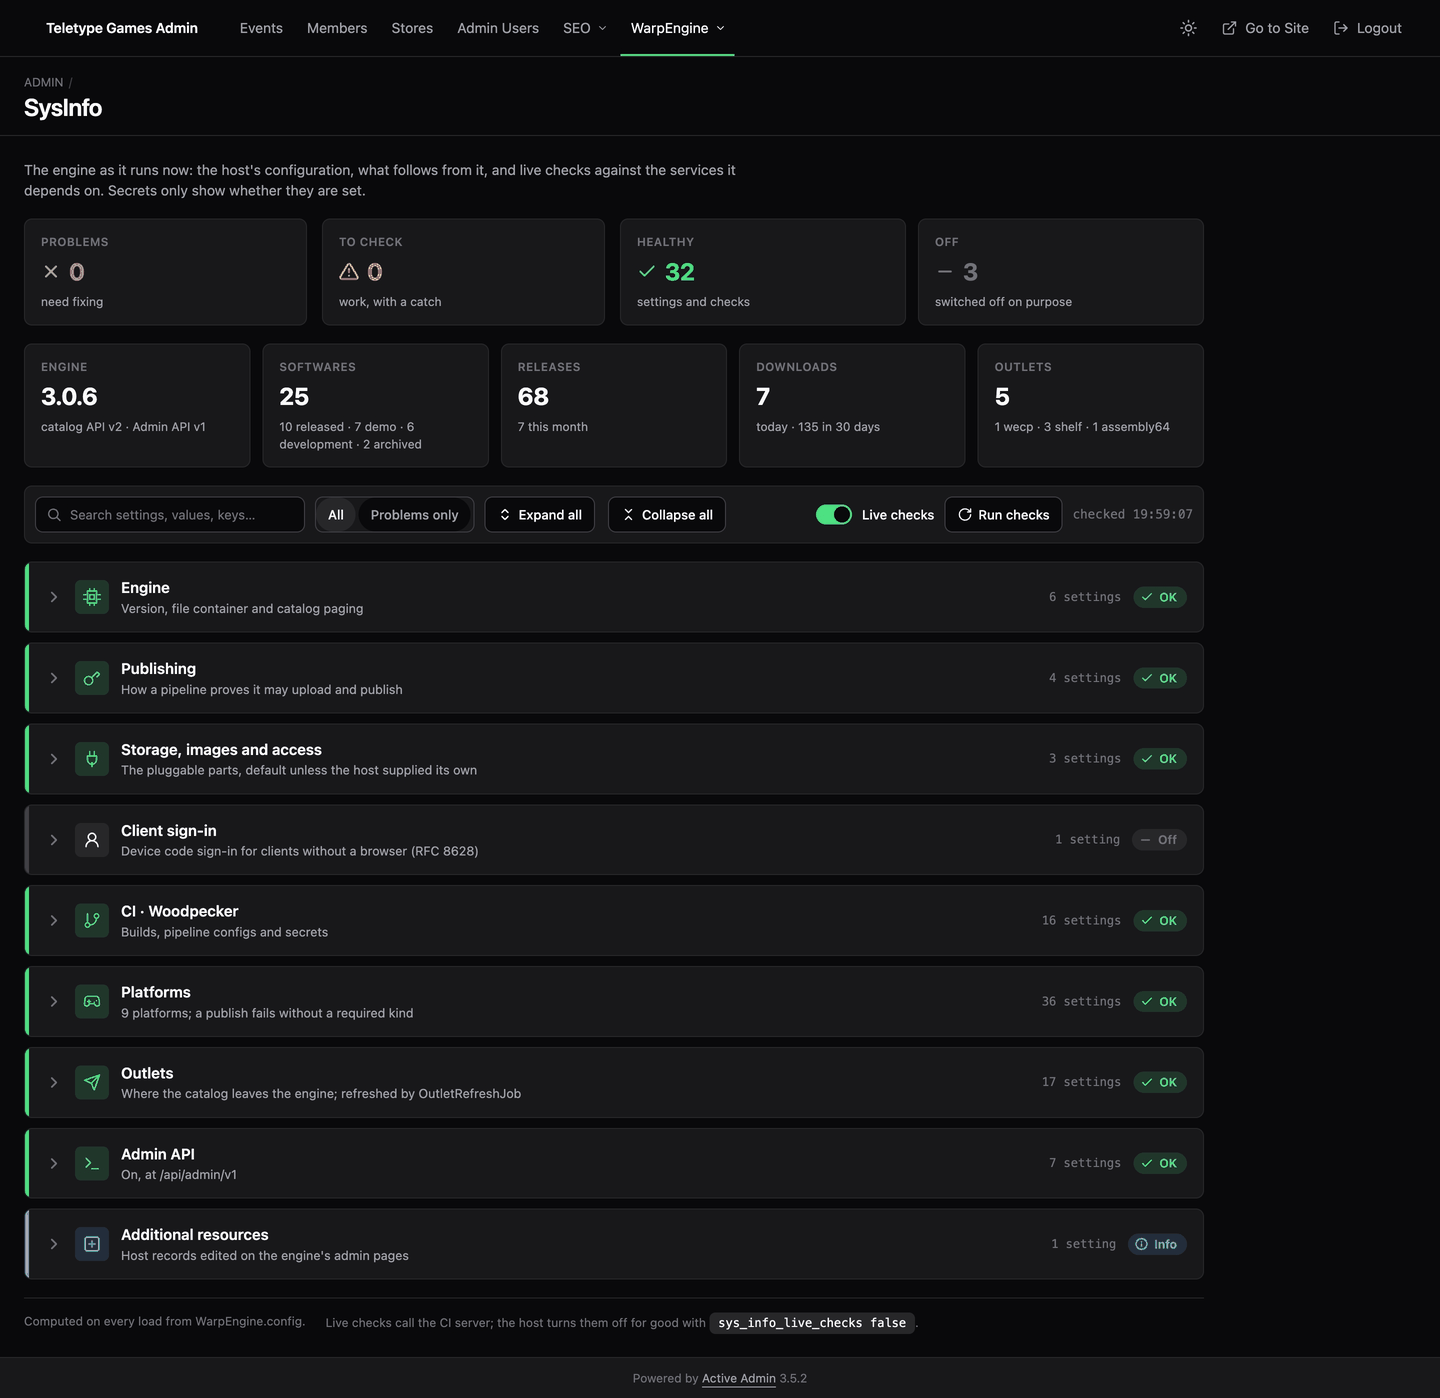
The engine repo carries a ready-made studio: the catalog with its admin, a Gitea forge and Woodpecker CI, all in containers. One script brings it up and wires the pieces together, so the first game you push builds and lands in the catalog.
What you need
- Docker with Compose: Docker Desktop, OrbStack, or Docker Engine with the compose plugin on Linux.
- git and curl.
Nothing else: no Ruby, no MySQL, no configuration to write.
Clone and set up
git clone https://git.teletypegames.org/engines/warp_engine.git
cd warp_engine/examples/compose
bin/setup
The first run takes a few minutes. The script:
- starts the catalog: the app installs its gems, runs the engine's install generator and the migrations, seeds three demo games and installs the web runtimes;
- starts Gitea with an admin (
warp/warpengine) and agamesorganisation for your games; - starts Woodpecker, connects it to Gitea and signs it in once, so the engine can enable repositories and hand them their pipelines;
- writes every generated token into
.env, restarts the catalog with them, and — when git has a credential helper — stores the Gitea password for your pushes.
It ends with the addresses and logins. Run it again any time: what is set up stays. Only the catalog and the admin? bin/setup --no-ci.
Look around
| Address | What it is |
|---|---|
| http://localhost:8080/ | The catalog page your players see: a plain list and a page per game, there to be replaced by your own site |
| http://localhost:8080/admin | The admin, admin@example.org / warpengine |
| http://localhost:8080/file/starhop/1.0.0/html/index.html | A demo game's web build, playable in the browser |
| http://localhost:8080/api/software | The catalog as JSON (WECP) — what store clients read |
| http://localhost:8080/api/docs | Interactive API docs |
| http://gitea.localhost:3000 | Gitea, warp / warpengine |
| http://woodpecker.localhost:8000 | Woodpecker CI |
*.localhost addresses reach your own machine in every browser, in curl and in git, so there is nothing to add to /etc/hosts. Ports taken? Set APP_PORT, GITEA_PORT or WOODPECKER_PORT in .env and run bin/setup again.
Under the admin's WarpEngine menu you find everything the engine brings: the softwares with their releases and assets, the image library, the file manager, download statistics, application tokens, CI pipelines and the SysInfo page, which shows the whole configuration with a status on every line.
Step 2 — Start your first game
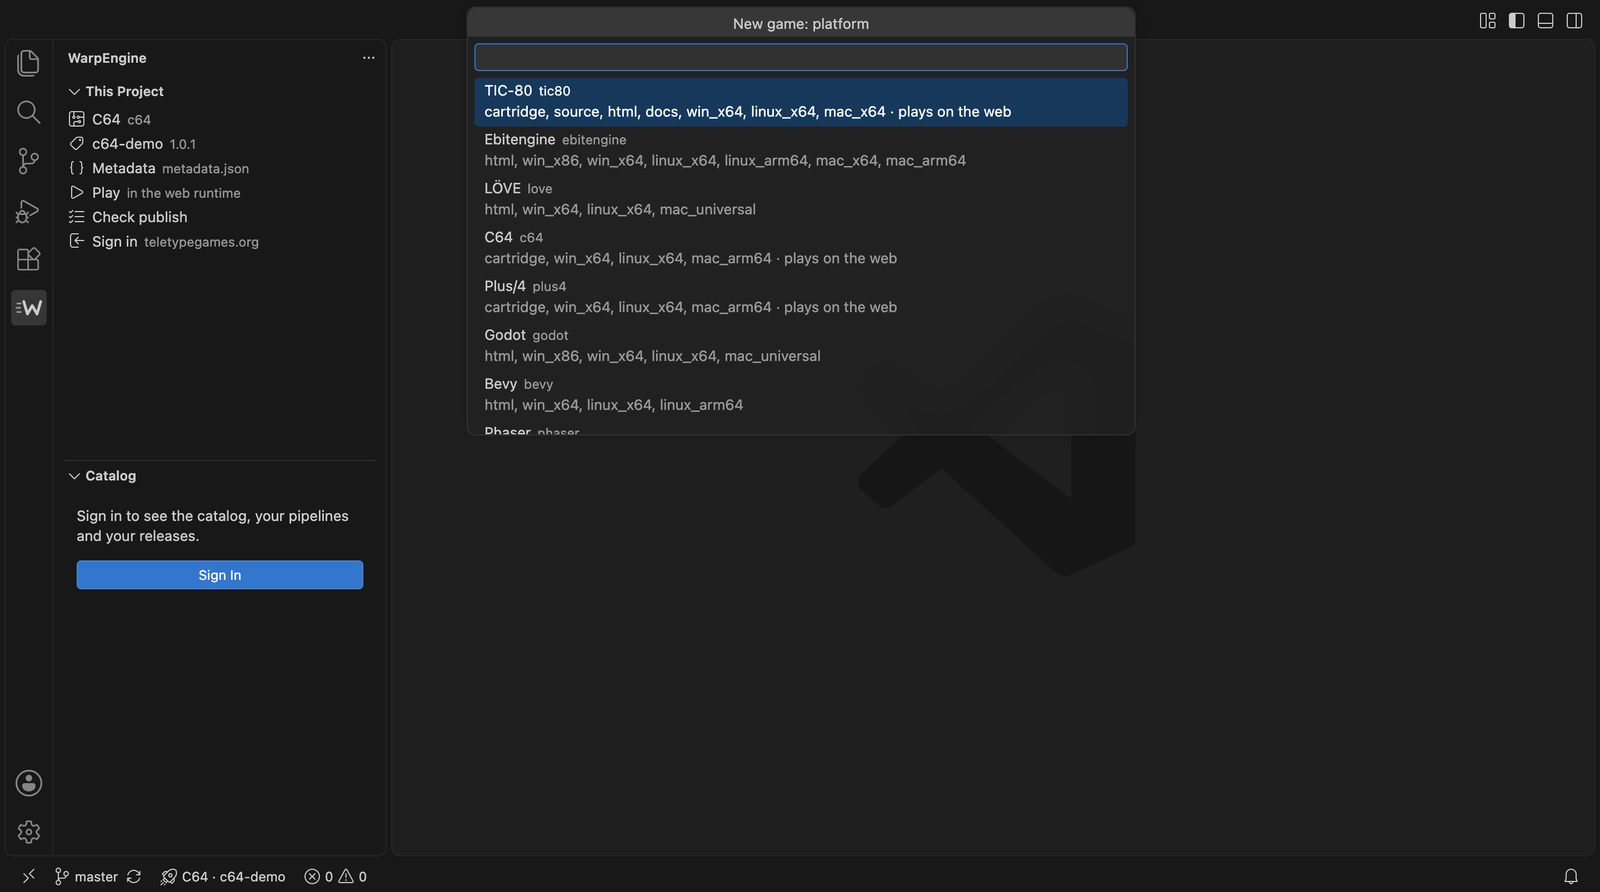
Install the toolbox from the Visual Studio Marketplace, point it at your catalog and sign in: the editor shows a code, you approve it on the admin's Tool Sign In page.
WarpEngine: Set Host…   →  http://localhost:8080
WarpEngine: Sign In
WarpEngine: New Game    →  platform, name, title, licence
The project starts from the platform's template (and its demo game, if you like), with the one-line pipeline marker and the metadata already filled in. Every platform: Platforms.
Step 3 — Play and test
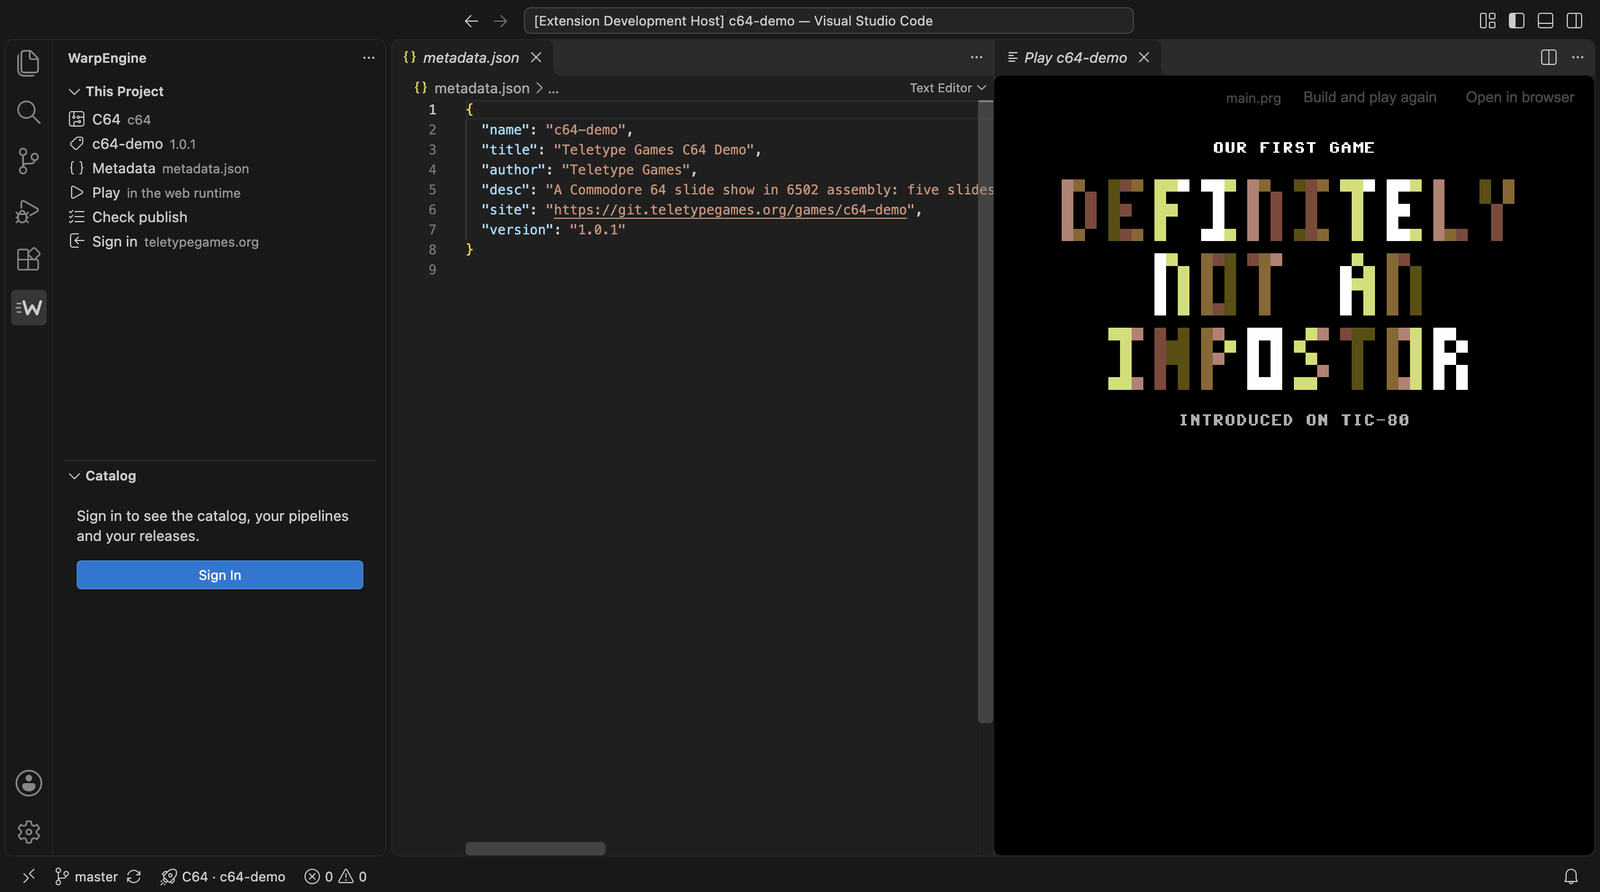
Play runs the game inside VS Code in the very runtime the catalog will use — the browser build, or the emulator for the C64, the Plus/4 and DOS. The toolbox checks the metadata against what the server will accept before anything is published.
Every branch you push gets its own development build with a link of its own, and a pull request gets a comment with it; a version like 1.3.0-beta.1 goes out on the beta channel, for the players who ask for betas. More in the Toolbox and the Reference.
Step 4 — Release
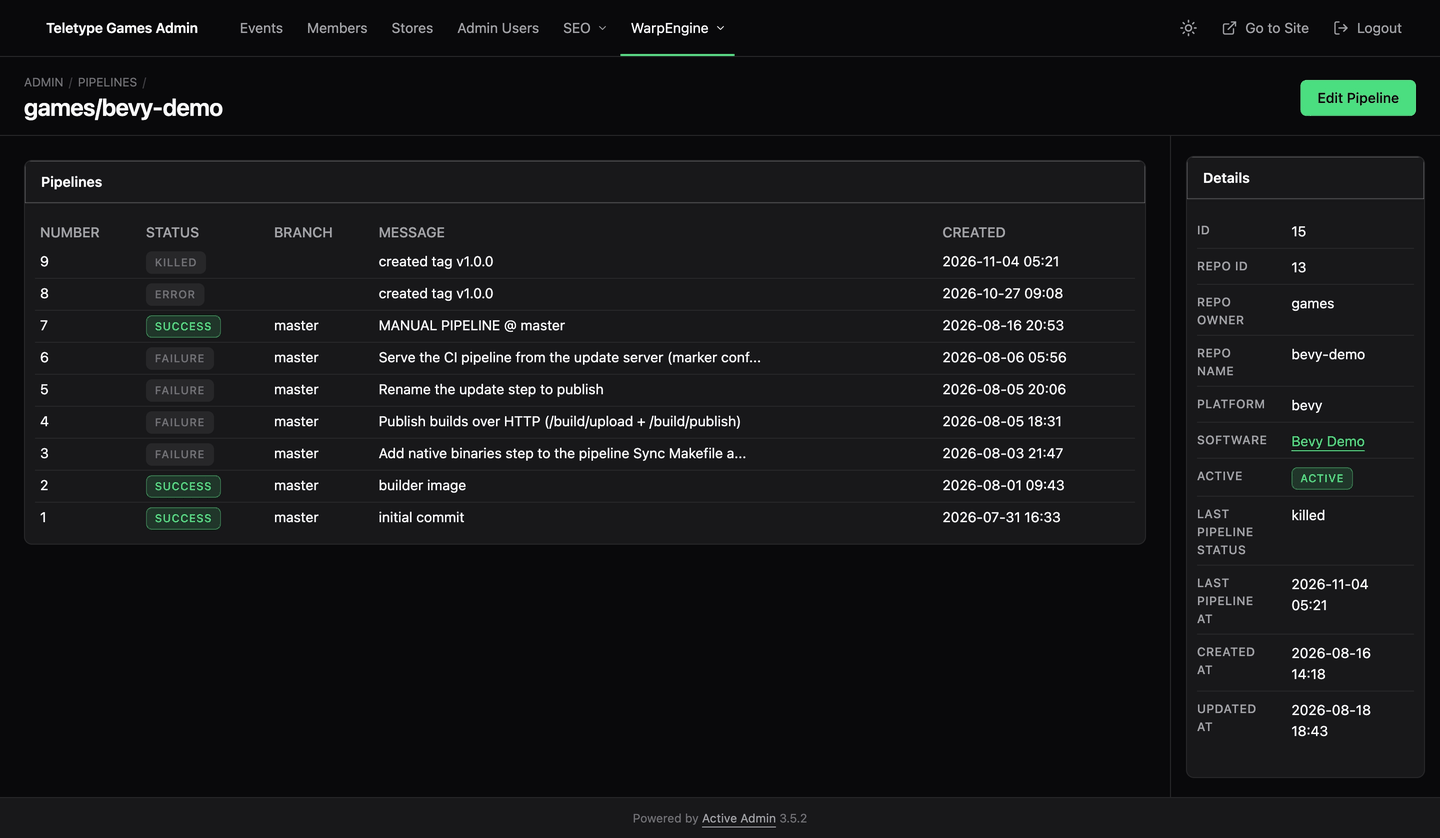
Connect creates the repository in your forge, enables it in the CI with its own token and pushes the game; the first build runs right away. From then on Release bumps the version, writes the changelog and pushes the tag:
WarpEngine: Connect
WarpEngine: Release     →  Stable / Beta, version
The pipeline is served by WarpEngine, so a fixed step or a new builder reaches every game at once. A minute later the release is in the catalog: a web build to play in the browser, zips to download, a cartridge for real hardware. Set the game to Released in the admin, and it is on your catalog page at http://localhost:8080/ — a plain list and a page per game, with no theme, made to be rewritten into your studio's own site.
Step 5 — Reach your players
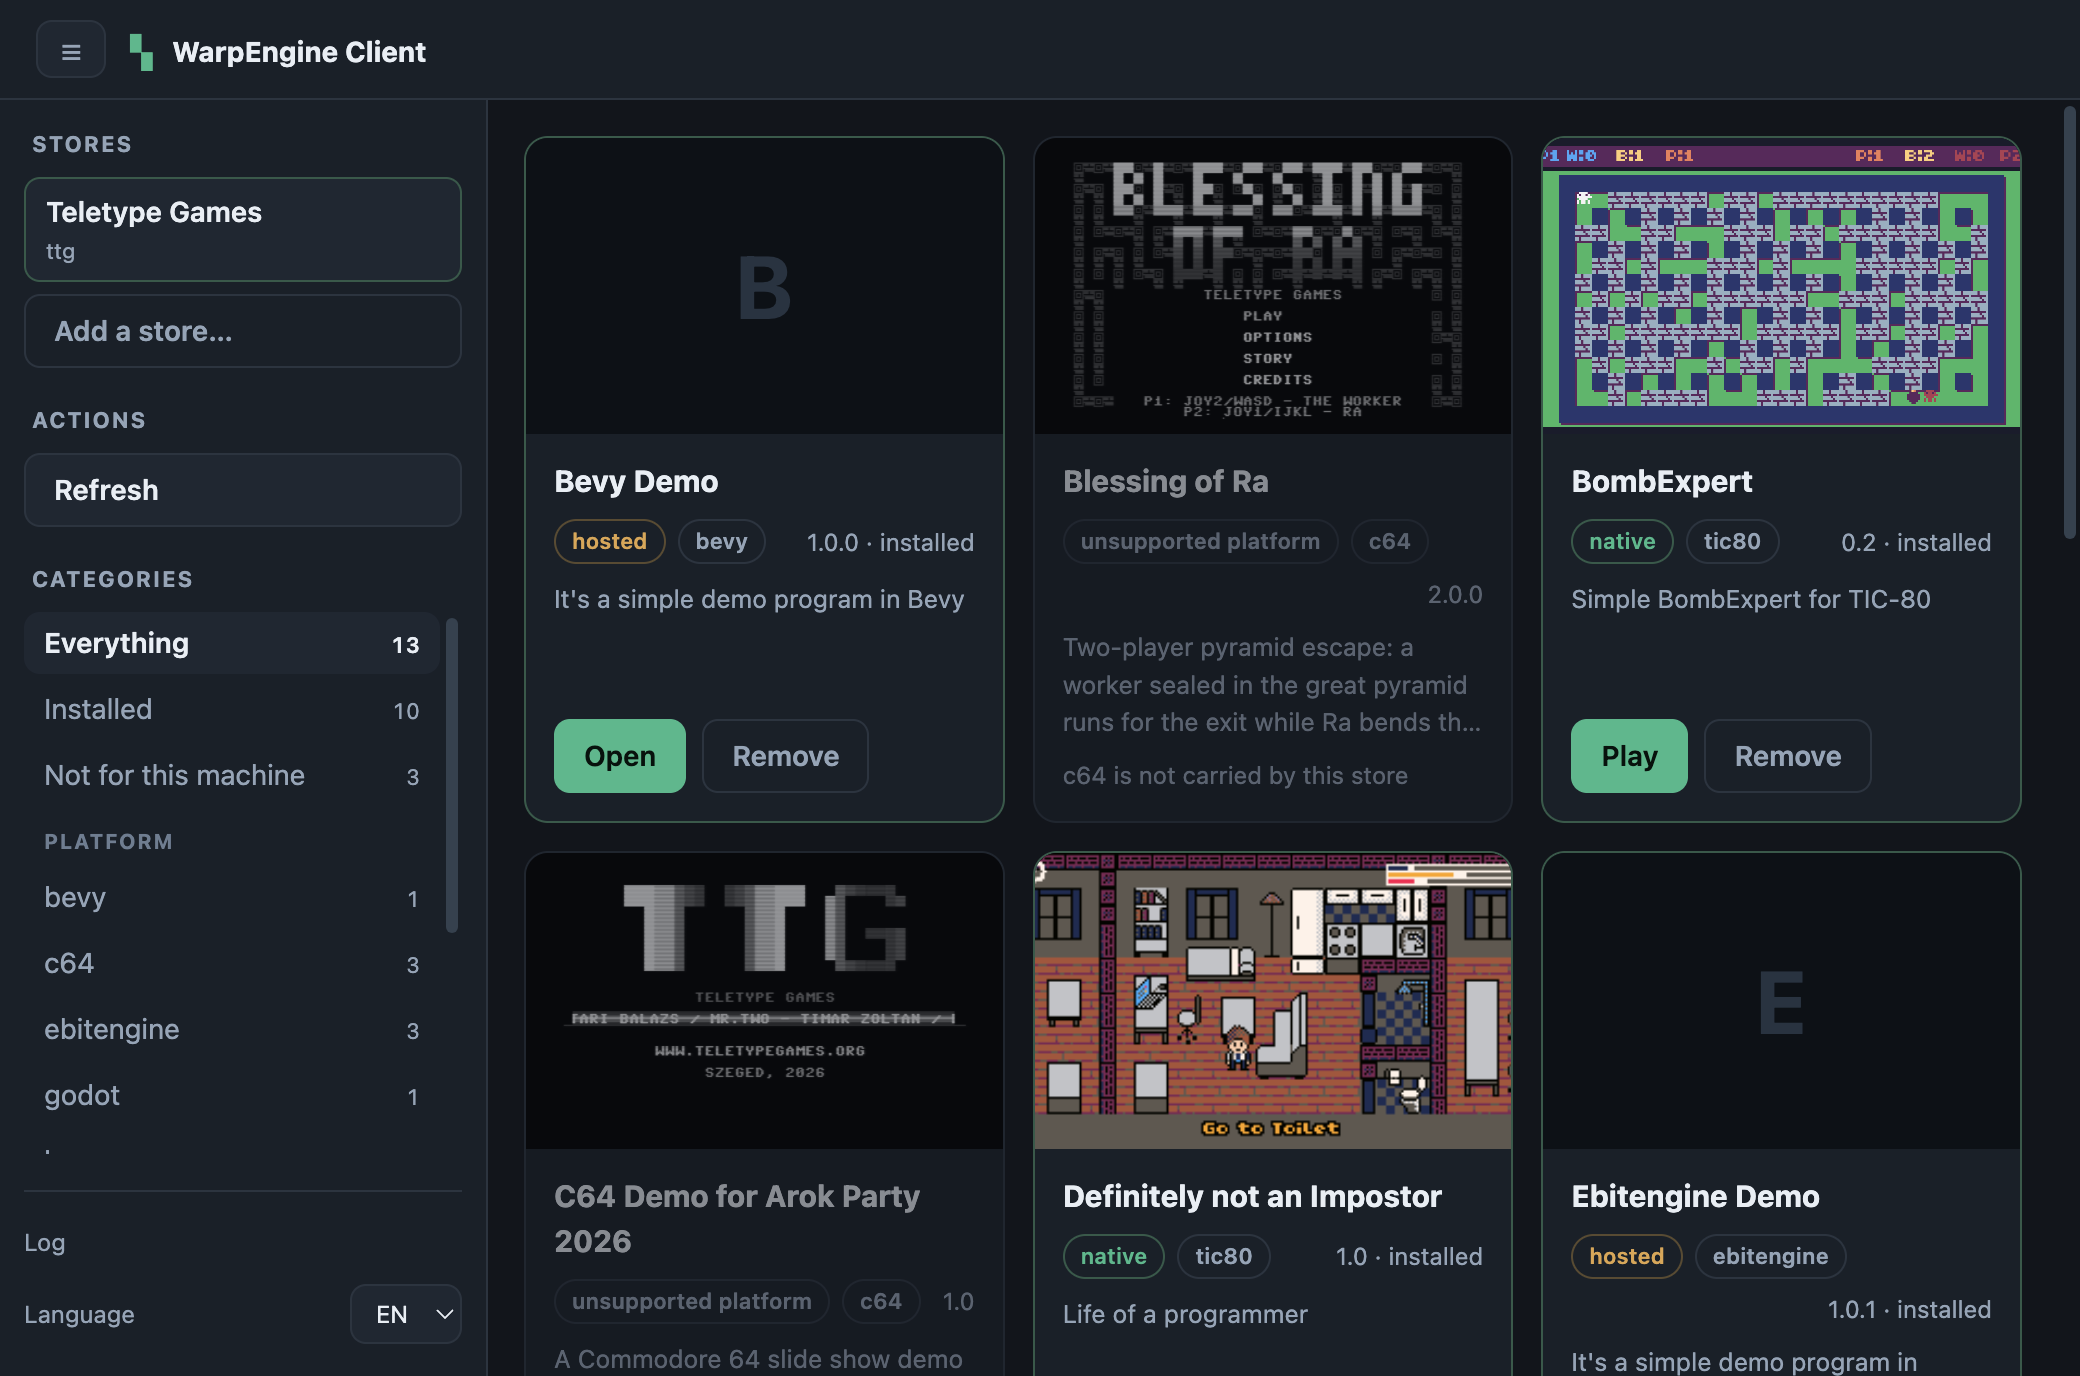
Every store reads the same catalog API (WECP), so all of them carry your games, not ours:
| Screen | How it gets your catalog | Read |
|---|---|---|
| Browser | Every release with a web build plays at its own address; the API serves the downloads | WECP |
| Desktop (Linux, macOS, Windows) | The WarpEngine Client takes your catalog address on first run | WarpEngine Client |
| Batocera | rails g warp_engine:store batocera writes the store's config and installer for your catalog |
Batocera Store |
| RetroArch | The same with retroarch, as playlists with box art — desktop, Android, Steam Deck |
RetroArch Store |
| C64 Ultimate, DOS | Shelves and the Assembly64 outlet, switched on in the host's config | Reference |
A Batocera store for the example stack, with the address the box can reach (your machine on the local network):
docker compose exec app bin/rails g warp_engine:store batocera \
  --base-url http://192.168.1.20:8080 --name "My Studio" --id mystudio
# then, on the Batocera box:
curl -fsSL http://192.168.1.20:8080/stores/batocera/install.sh | sh
The box gets its own My Studio entry in the EmulationStation menu, with your games and an updater. The generated config is a file of your host's to edit.
Under the hood
The example stack is a plain Rails app with the engine mounted; this is what is in it, and how to play the CI by hand.
Publish a release by hand
A CI pipeline publishes with nothing but a few HTTP calls, so you can play the pipeline yourself. Run this from any empty directory:
cat > demo-0.1.0.metadata.json <<'JSON'
{ "name": "demo", "title": "Demo Game", "author": "You", "desc": "Hello", "license": "MIT", "category": "demo" }
JSON
echo '<h1>demo</h1>' > index.html && zip demo-0.1.0.html.zip index.html
echo hello > game.bin && zip demo-0.1.0-win-x64.zip game.bin

for f in demo-0.1.0*; do
  curl -fs -H "X-Update-Secret: example-update-secret" \
    -F "file=@$f" "http://localhost:8080/build/upload?name=demo&version=0.1.0"
done

curl -X POST -H "X-Update-Secret: example-update-secret" \
  "http://localhost:8080/build/publish?platform=love&name=demo&version=0.1.0"
Reload the admin: Demo Game is there with its web build (http://localhost:8080/file/demo/0.1.0/html/index.html) and its Windows zip. A new title starts In development, which the public catalog does not list; set it to Released on its page to show it.
What is in the example
examples/compose/host_app is a plain, small Rails app — the same few things any host adds to use the engine:
- one line in the
Gemfile:gem "warp_engine"; config/initializers/warp_engine.rb: where the builds live, the forge, the CI with a builder image per platform, the project templates, the Admin API;mount WarpEngine::Engine => "/"inconfig/routes.rb;- a catalog page with no theme at all (
CatalogControllerand two views inapp/views/catalog), rendering the same data/api/softwareserves — rewrite it, or replace it with a site of your own; - ActiveAdmin and Devise for the admin (optional — without them the engine runs headless: API and publishing only);
- the image library: the
Imagemodel, the/api/image/:idendpoint and its admin page. It is the host's on purpose, so the same images can serve the rest of the site too.
The engine itself is mounted from the cloned repository, so a change you make in the engine's code shows up in the running example.
Stop or remove
docker compose --profile ci down      # stop; the data stays
docker compose --profile ci down -v   # stop and delete everything
Where to get it
Nothing to register, nothing to sign: everything is pulled straight from us, public and without a login.
- The engine —
git clone https://git.teletypegames.org/engines/warp_engine.git(MIT licence), or as a gem from our registry:source "https://git.teletypegames.org/api/packages/engines/rubygems"in a Rails app'sGemfile. - The builder images —
git.teletypegames.org/build/…, pinned to a dated set the example names; the engine's README lists them. - The toolbox — the Visual Studio Marketplace, or the
.vsixfrom its releases. - The stores — the Stores pages, each with its own install steps.
What it does not do (yet)
- Steam or itch.io — the catalog is your own; there is no upload to the big stores yet.
- Payments — the catalog can gate downloads behind an access policy, but it handles no money.
- Any forge — new repositories are created on Gitea (or Forgejo); GitHub and GitLab are not supported for that yet.
- Signed desktop builds — Windows and macOS builds come unsigned.
- Native arm64 builders — the builder images are amd64; on an Apple Silicon machine they run emulated, slower.
We run on it
teletypegames.org is a WarpEngine host, built the way this page describes: on 17 November 2026 its public catalog carried 25 titles on 9 platforms with 64 releases and close to 800 downloads, served to browsers, the desktop client, Batocera boxes, RetroArch, Commodore 64 Ultimates and DOS machines. Every one of those games went through the same pipeline your first game will.